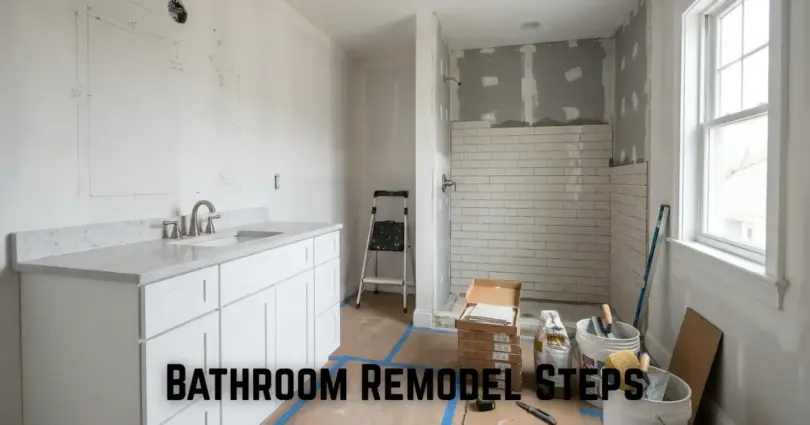

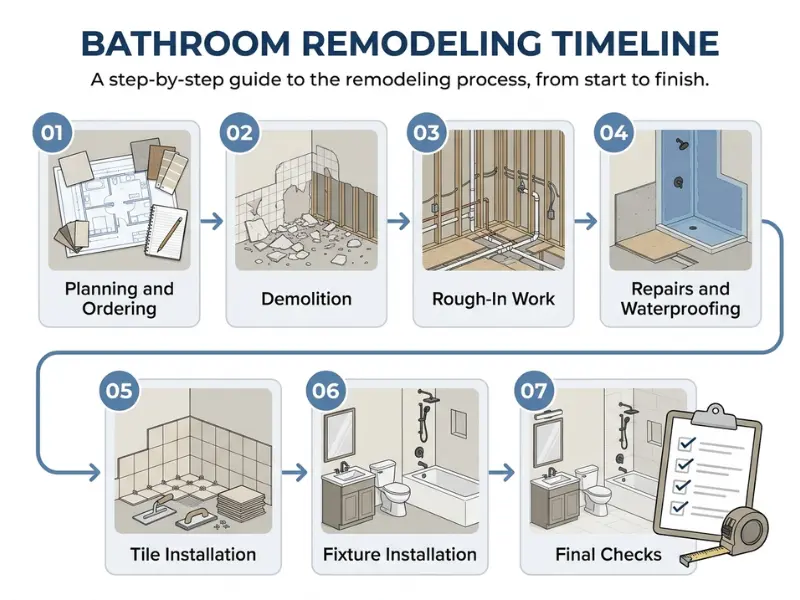
Bathroom remodel steps usually start with setting your budget, choosing a layout, and hiring the right professionals. Next, confirm permits, order materials, and prepare the space. The work then moves through demolition, plumbing and electrical changes, repairs, waterproofing, tile, fixtures, and finishing touches. Finish with inspections and a full check of leaks, drains, lights, fans, and doors before making final payments.
Planning a bathroom remodel sounds exciting until you start asking questions. Should you buy the tiles first? Do you need a permit? When should the plumber come? And what happens if the contractor finds water damage behind the wall?
Without a clear plan, these questions can quickly turn an exciting project into a stressful and costly mess. The right bathroom remodel steps help you avoid confusion and make better choices before problems arise.
You’ll learn how to plan your budget, choose the right contractor, order materials, and follow each stage of the bathroom renovation process. We’ll also cover details that homeowners often overlook, such as checking product sizes, planning bathroom access during construction, and setting aside money for unexpected repairs.
Planning the layout, budget, and material choices before demolition can help you avoid expensive changes later. Start by deciding what you want your new bathroom to do better.
What Should You Decide Before Remodeling Your Bathroom?
Start by deciding what you want to change, what you need to keep, and how much you can spend. Your choices will shape the design, cost, and amount of work your bathroom needs.
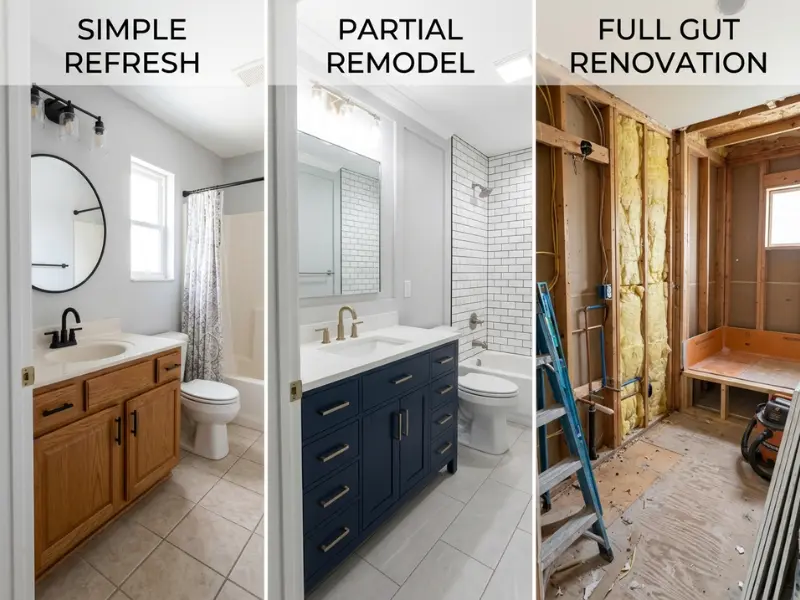
A bathroom remodel can mean a few simple updates or a full gut renovation. Knowing which one fits your needs helps you plan the work without spending money on changes you don’t need.
Decide Between a Refresh, Partial Remodel, and Full Gut Remodel
Not every bathroom needs to be stripped down to its walls. Choose the type of project that solves your actual problems.
- Bathroom refresh: Replace items like paint, lights, mirrors, or cabinet handles.
- Partial remodel: Replace the vanity, toilet, flooring, or shower while keeping most of the layout.
- Full gut remodel: Remove most existing finishes and fixtures, then rebuild the room.
For example, if your bathroom has good plumbing and a solid floor but looks old, new paint, lighting, and a vanity may be enough.
If the shower leaks or the floor feels soft under your feet, you may need repairs before choosing new finishes.
Keep the Current Layout or Change It?
Keeping your toilet, shower, and vanity in their current places can reduce plumbing work. Moving them may improve the room, but it can also add labor and cost.
Before changing the layout, check:
- Can you open the door without hitting the vanity or toilet?
- Is there enough room to get in and out of the shower safely?
- Can you reach the shower controls without standing under cold water?
- Do you have enough storage for your daily items?
Think about a small bathroom where the door hits a large vanity. A narrower vanity may solve the problem without moving walls or pipes.
List Your Needs Before Your Wants
Write down what your bathroom must do better before choosing colors or tile.
Needs might include fixing leaks, adding storage, improving lighting, or making the shower safer. Wants might include a rainfall showerhead, heated flooring, or a new style of tile.
Use the layout test: Before planning major changes, ask whether the bathroom would work well if you fixed its problems but kept every fixture in the same place. If the answer is yes, compare the cost of a refresh or partial remodel before choosing a full renovation.
In practice, starting with your needs helps you spend more on repairs that matter and less on changes that only look good.
How Much Should You Budget for a Bathroom Remodel?
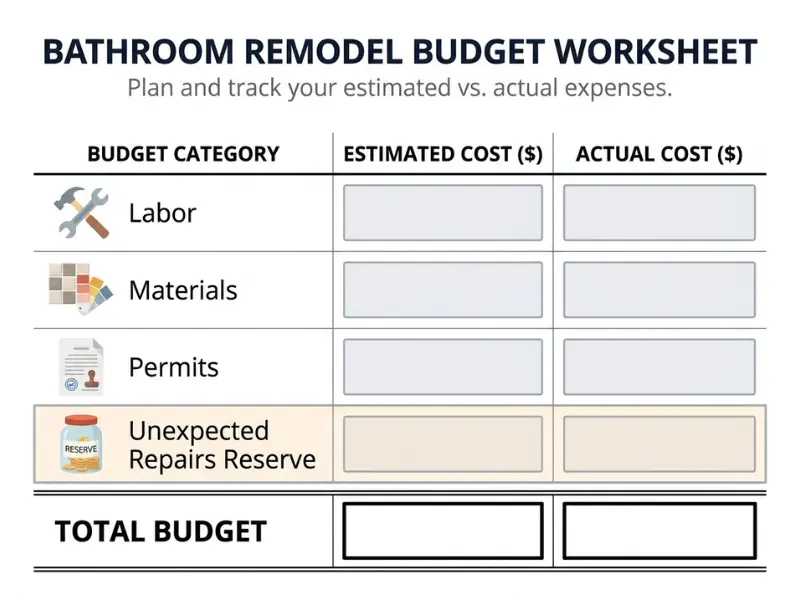
Set your budget before buying materials or starting demolition. Include labor, fixtures, permits, and a reserve for hidden repairs so unexpected costs don’t catch you off guard.
Your bathroom remodel budget depends on the room’s size, the materials you choose, and how much construction the project needs. Keeping the existing plumbing layout and choosing standard-size fixtures can reduce costs without sacrificing safety.
List the Main Remodeling Costs
Break your budget into clear parts so you can see where your money will go.
- Labor: Contractor, plumber, electrician, and tile installer fees.
- Fixtures: Vanity, toilet, sink, tub, shower, and faucets.
- Materials: Tile, flooring, grout, paint, and wall panels.
- Extra costs: Permits, delivery, waste removal, and inspections.
For example, keeping your toilet and shower in their current places may reduce plumbing work. Moving them can require new pipes, more labor, and extra repairs.
Ask contractors to list labor and materials separately. This makes it easier to compare quotes and spot costs that one contractor may have left out.
Set Aside Money for Hidden Repairs
A bathroom can hide problems behind tile, under flooring, or inside walls. Water may damage the wood beneath a leaking shower without leaving clear signs on the surface.
A reserve of 10 to 20 percent of your planned budget can be a useful starting point. Older homes or full gut remodels may need more.
If your planned work costs $10,000, a 15 percent reserve would add $1,500 for unexpected repairs. That’s a planning example, not a promise that repairs will stay within that amount.
Choose Where to Spend and Where to Save
Spend first on safe plumbing, electrical work, and proper waterproofing. You can often save money by keeping a working layout, choosing simple tile patterns, or reusing sound features.
Create three budget lists: Separate required repairs, planned upgrades, and optional extras. If costs rise, you can review the optional list first instead of cutting corners on work that protects your home.
How Do You Choose a Bathroom Contractor and Check Permit Rules?
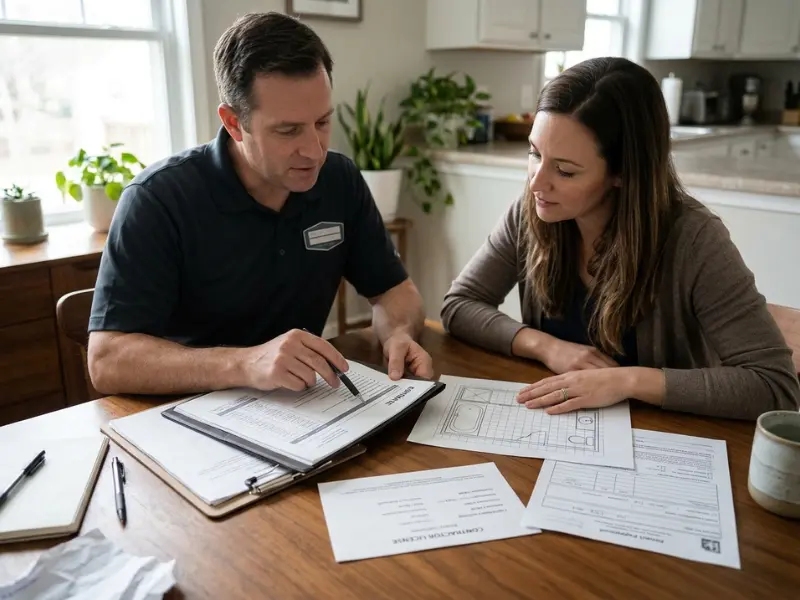
Choose a qualified contractor and check local permit rules before work begins. Compare written quotes that cover the same tasks, materials, and finish details.
A low price may look tempting, but missing work can lead to extra charges later. A clear contract helps you understand what you’re paying for and who is responsible for each task.
How to Check a Contractor
Before hiring someone, ask about their experience with projects like yours.
- Check the license required in your area.
- Ask for proof of insurance.
- Contact recent customers and review similar projects.
- Ask who will handle plumbing, electrical work, and daily site management.
For example, if you’re replacing a tub with a walk-in shower, ask whether the contractor has completed similar projects and can explain the waterproofing plan.
How to Compare Contractor Bids
Get written quotes from at least two or three contractors when possible. Make sure each quote covers the same work so you can compare prices fairly.
Check that each quote explains:
- Labor, materials, and fixture allowances.
- Tasks that are not included in the price.
- Payment dates and the expected work schedule.
- How the contractor will price and approve extra work.
Use a missing-work check: Before choosing the lowest quote, compare every major task against your project list. A quote that leaves out demolition disposal, waterproofing, or fixture installation may cost more once those items get added.
When Do You Need a Permit or Inspection?
Permit rules depend on your city, county, and state. Simple cosmetic updates may not need approval, while plumbing changes, new wiring, or structural work may require permits and inspections.
Contact your local building department before construction starts. Ask which permits apply, who will arrange them, and which inspections must happen before walls or floors close.
Keep copies of permits, inspection records, and approved changes with your project paperwork.
How Should You Plan the Design and Order Materials?
Plan your bathroom layout, choose your fixtures and finishes, and confirm delivery dates before construction starts. This helps prevent costly changes and delays once the old bathroom is removed.
Your design should fit your daily needs, available space, and budget. Check measurements carefully, because even a small mistake can leave a vanity, shower door, or toilet in the wrong place.
Measure the Bathroom and Confirm the Layout
Measure the room before buying anything. Record the wall lengths, ceiling height, door swing, window locations, and positions of existing plumbing.
Check the space around each fixture, too. Make sure drawers can open, doors do not hit each other, and you can enter and leave the shower safely.
For example, a 36-inch vanity may look right in a store but leave too little walking space in your bathroom. Marking its size on the floor with tape can help you spot the problem before buying it.
Choose Fixtures and Finishes
Choose items that work together in size, style, and use. You do not need to buy everything from one brand, but each item must fit your planned layout.
- Fixtures: Vanity, toilet, sink, tub, showerhead, and faucets.
- Surfaces: Floor tile, wall tile, countertop, and shower materials.
- Lighting: Ceiling lights, vanity lights, and suitable bathroom fittings.
- Storage: Cabinets, shelves, drawers, and medicine cabinets.
Check the care instructions before choosing finishes. Textured tile may offer grip, but some surfaces take more effort to clean than others.
Order Materials and Check Delivery Dates
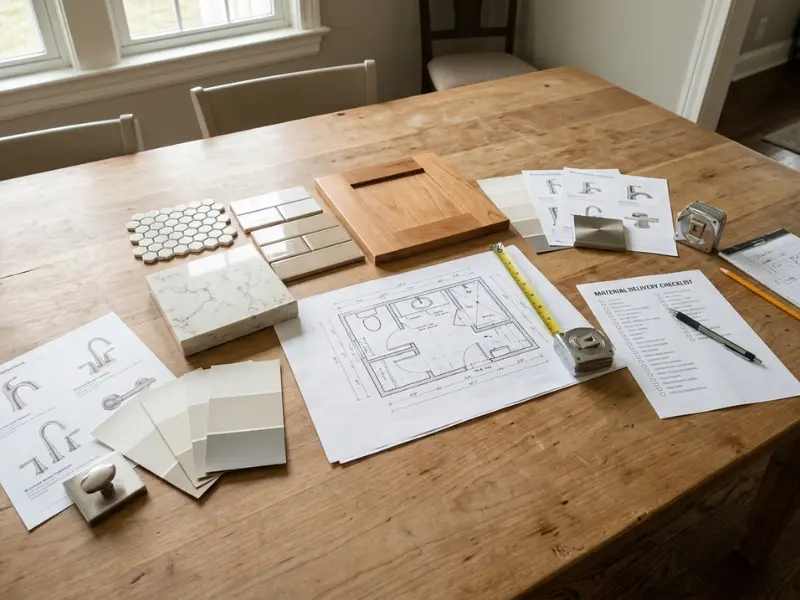
Order materials early, especially items made to order, custom glass, and special-order tile. Delivery times vary, so confirm dates with the supplier instead of assuming everything will arrive quickly.
Before placing an order, check:
- Measurements, colors, model numbers, and quantities.
- Return rules for opened or special-order items.
- Whether matching tiles and replacement parts are available.
- Who will inspect deliveries for damage or missing pieces.
Create a material readiness list: Mark each item as ordered, delivered, or checked. For example, do not plan shower installation until you have confirmed that the shower base, drain parts, waterproofing products, and required fittings are compatible.
Confirming that all required parts have arrived can prevent installation delays.
What Happens During Bathroom Demolition?
Bathroom demolition removes the old fixtures and finishes so workers can inspect the space and prepare it for new work. The goal is to clear the room without causing avoidable damage to the parts you plan to keep.
The amount of demolition depends on your project. A simple update may need only a vanity or floor removed, while a full gut renovation may expose the walls, floor, and plumbing.
Remove Old Fixtures and Finishes
Before demolition begins, the right water and electrical supplies must be shut off. A qualified professional should handle work that involves unsafe wiring, plumbing connections, or other hazards.
Depending on your plan, workers may remove:
- The vanity, sink, toilet, tub, or shower.
- Old flooring, wall tile, and damaged wall panels.
- Cabinets, mirrors, and unwanted fittings.
- Debris that needs safe disposal.
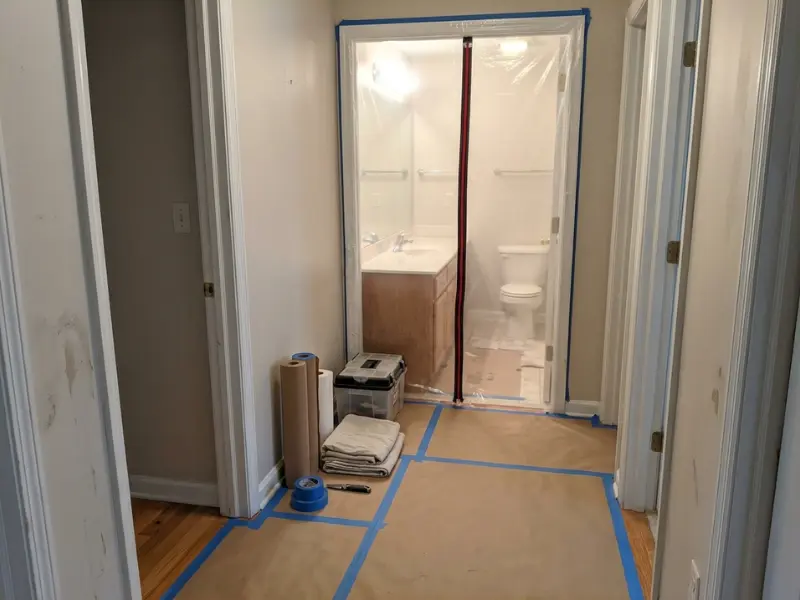
Protect nearby rooms from dust and cover floors along the route workers will use. If your home was built many years ago, materials such as old paint or flooring may need testing before removal.
Inspect What the Old Bathroom Hid
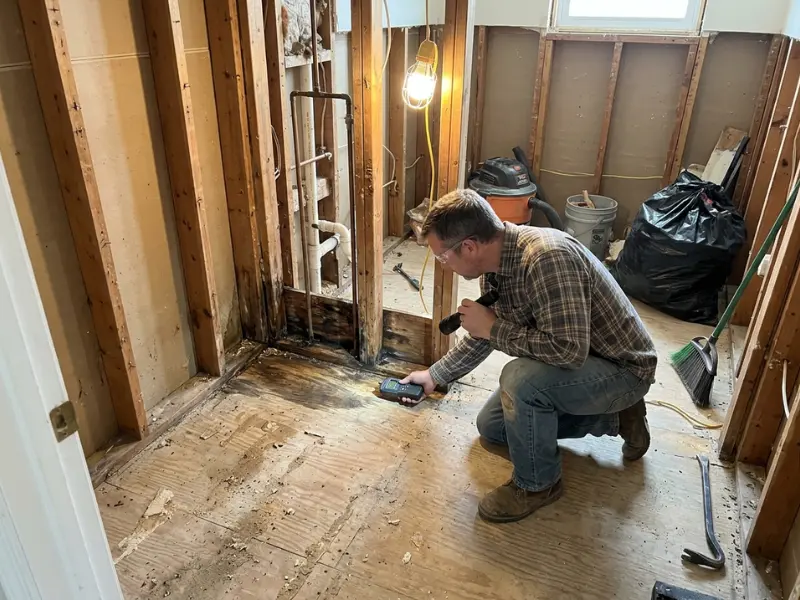
Once the old surfaces are gone, check the exposed areas for damage. Look for water stains, soft wood, mold-like growth, rusted pipes, and a damaged subfloor.
A leaking shower may have damaged the wood beneath the tile even when the floor looked fine. The cause of the leak must be fixed before new materials cover the area.
Take photos of exposed pipes, wiring, framing, and damage. These pictures can help you track repairs and understand what sits behind the finished walls.
Agree on Repairs Before Work Continues
Some problems only become visible during demolition. Ask the contractor to explain what is damaged, what needs repair, and why the work was not included in the original quote.
Get the added cost and any schedule change in writing before approving extra work. This helps you avoid disagreements about the final bill.
Separate discovery from approval: Finding damage does not mean every suggested upgrade is necessary. Ask which repairs are needed for safety or to complete the agreed work, and which changes are optional.
How Do You Prepare Your Home Before Demolition?
Prepare your home by arranging bathroom access, protecting nearby rooms, and confirming that the workers and materials are ready. A little planning can make the construction period easier for everyone in your household.
Even a small bathroom remodel can disrupt your routine. Decide where you will wash, shower, and use the toilet before the room becomes unavailable.
Set Up a Temporary Bathroom Plan
If you have another bathroom, decide who will use it and when. If you have only one, ask your contractor how long the toilet, shower, or water supply may be unavailable.
Plan for children, older adults, and anyone who may need easy access to a bathroom. If you need another place to shower, arrange it before demolition starts.
Protect Nearby Rooms and Belongings
Dust can spread through doorways and hallways. Remove items near the work area and ask the crew how they will control dust and carry debris out.
- Cover nearby floors and furniture.
- Move towels, toiletries, and personal items.
- Keep pets and children away from the work zone.
- Clear a safe path for workers and material deliveries.
Confirm the Start Date and Work Plan
Check that the main materials have arrived and that the contractor has confirmed the start date. Ask who will be on site, when work will begin, and how the team will secure the room at the end of each day.
Use a final readiness check: Before demolition day, confirm three things: your household has a bathroom plan, the work area is clear, and the contractor knows which fixtures or surfaces must stay. If any answer is no, resolve it before work begins.
When Should Plumbing, Electrical, and Ventilation Work Happen?
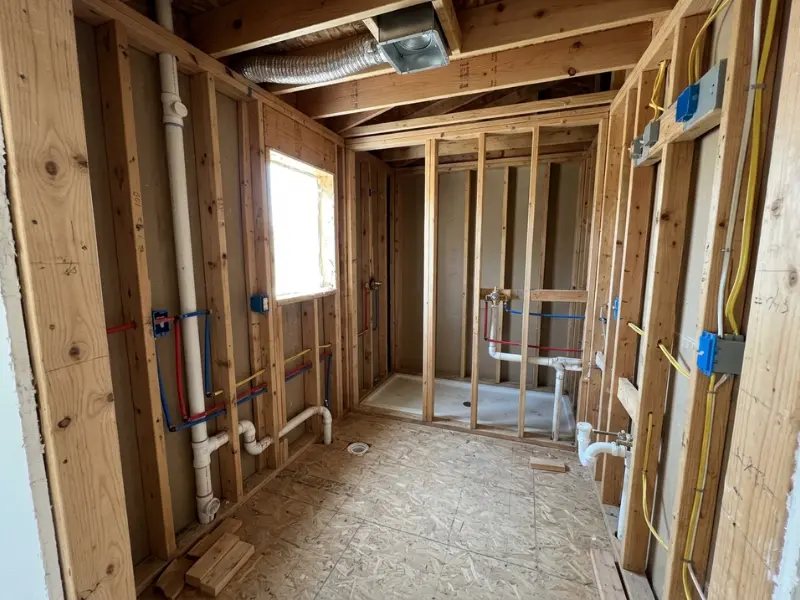
Plumbing, electrical, and ventilation work should happen after demolition and before the walls are closed or finished. These systems need to be checked while pipes, wires, and ducts are still easy to reach.
The exact order depends on your bathroom layout and local code. Your contractor should coordinate the trades so one worker does not block or damage another worker’s work.
Complete Plumbing Rough-In Work
Plumbing rough-in means installing or changing the pipes and connections that will sit behind walls, under floors, or inside the shower area.
A plumber may need to move water supply lines, adjust drain pipes, or install a new shower valve. The drain and pipe layout must match the fixtures you have chosen.
For example, replacing a shower with a tub may require different drain and water connections. Confirm the tub model and drain location before the plumber finishes this work.
Complete Electrical Work Safely
Electrical work should be handled by a qualified electrician when required by local rules. The electrician can check the planned locations for lights, switches, outlets, and any powered bathroom features.
- Confirm outlet placement and required GFCI protection.
- Plan suitable lighting around the mirror and shower area.
- Check wiring for the exhaust fan and other powered fixtures.
- Keep electrical fittings suitable for their location and exposure to moisture.
Do not assume an existing outlet or light can stay where it is. New fixtures may need different wiring, protection, or placement to meet local code.
Check Bathroom Ventilation
A bathroom exhaust fan helps remove moisture that can collect on walls, ceilings, and mirrors. The fan should be suitable for the room and vent outdoors where required, not into an attic or another enclosed space.
Check that the duct follows the fan manufacturer’s instructions and that the outside vent is not blocked. A new fan will not work well if the duct is crushed or poorly fitted.
Complete Required Rough-In Inspections
Some projects require inspections before walls or floors are covered. Check the local permit requirements and arrange each inspection at the right stage.
Use a before-the-walls-close checklist: Take clear photos of pipes, wiring, shut-off valves, and duct routes. Keep the photos with your project records so future repairs are easier without opening finished walls.
How Should You Repair Walls, Framing, and Flooring?
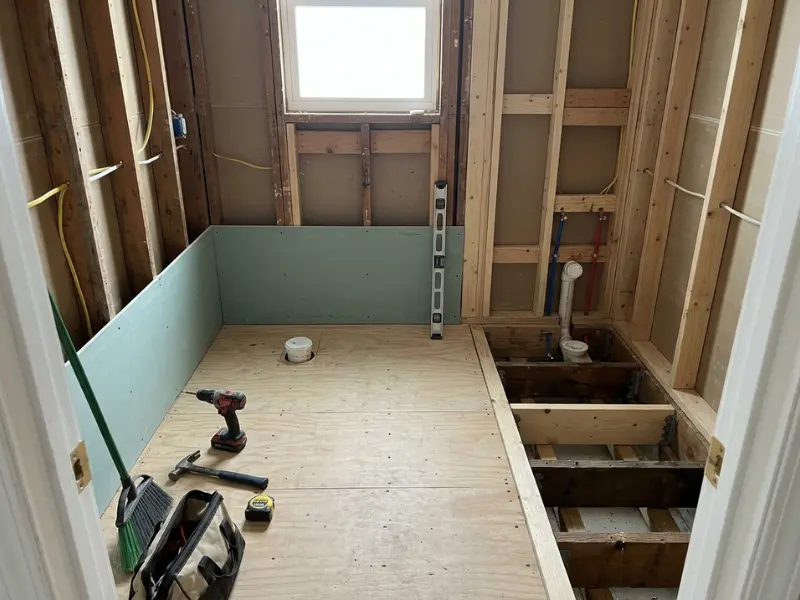
Repair damaged framing, walls, and flooring before installing new bathroom finishes. Every surface must be sound, dry, and suitable for the material that will cover it.
New tile or flooring cannot fix weak wood, a leaking pipe, or a damaged subfloor. Find and correct the cause of the problem first, then prepare the surface for installation.
Repair Hidden Damage
Inspect the exposed areas for soft wood, loose framing, damaged floor panels, and signs of past leaks. If you find mold-like growth or major water damage, ask a qualified professional to assess it and identify the cause.
Repairs may include replacing damaged wood, fixing plumbing leaks, or correcting an uneven floor. Do not cover wet materials before the source of moisture has been fixed and the area is ready for rebuilding.
For example, if a toilet leak has damaged the floor around its base, replacing the visible flooring alone will not solve the problem. The damaged subfloor may also need repair.
Prepare Surfaces for New Materials
Once repairs are complete, prepare each surface for the finish it will support. Shower walls, bathroom floors, and painted walls may need different materials and methods.
- Use suitable backer board or an approved wall system where needed.
- Make sure the floor is stable and within the flooring maker’s flatness limits.
- Remove loose material and clean surfaces before installation.
- Follow product instructions for fasteners, joints, and surface preparation.
Do not assume ordinary drywall is suitable for every wet area. The correct wall system depends on where it will be used and the waterproofing method.
Check the cause, not just the damage: Before approving a repair, ask what allowed the damage to happen. Fixing a leak or correcting a poor drain connection helps protect the new materials from the same problem.
How Do You Waterproof a Shower Before Installing Tile?
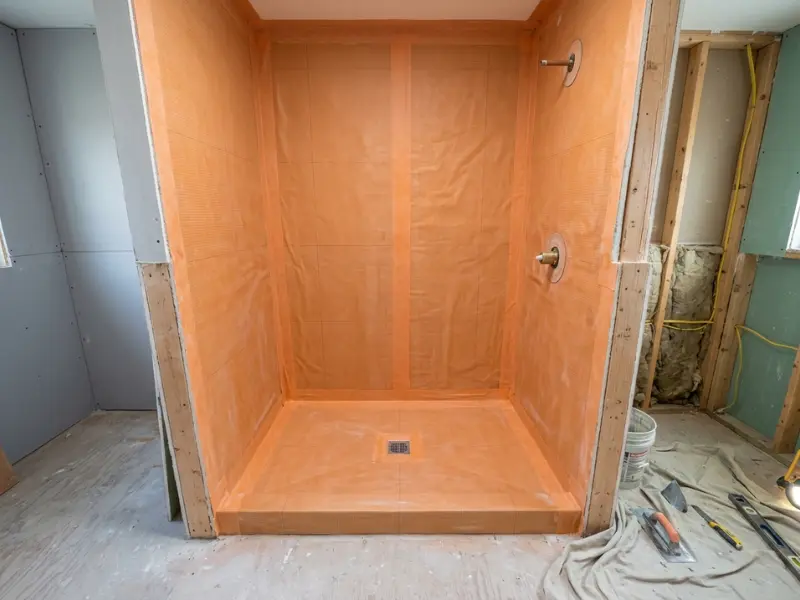
Waterproof the shower using a compatible system designed for the shower base, walls, seams, and drain. Check the work before installing tile because tile and grout alone do not stop water from reaching the structure.
The correct method depends on the shower system you choose. Follow its instructions closely, including how to seal corners, connect the drain, and allow products to cure.
Prepare the Shower Base and Drain
The shower base must direct water toward the drain without leaving puddles. The required slope and drain connection depend on the shower system and local code.
Check that the base is stable and that the drain fits the chosen waterproofing system. A mismatch between the drain and membrane can create a leak even when the tile looks well installed.
Install the Waterproofing System
A shower may use a sheet membrane, liquid-applied membrane, or another approved waterproof system. These products are not all installed the same way, so do not mix parts from different systems unless the manufacturers confirm they are compatible.
Pay close attention to:
- Sealed corners, seams, and changes in wall direction.
- The connection between the waterproofing and drain.
- Pipe openings and other points where water could pass through.
- Required thickness, drying time, and curing conditions.
For example, a liquid membrane may need more than one coat to reach its required thickness. Follow the product instructions rather than judging coverage by appearance alone.
Check the Work Before Tile Goes In
Complete any required water test or inspection before covering the shower. The test method and timing depend on the system and local rules.
If a test shows a leak, fix the problem and repeat the required checks before installing tile. Tile can make a hidden waterproofing failure much harder to reach.
Keep proof of the waterproofing stage: Take photos of the completed membrane, sealed corners, and drain connection before tile covers them. Record the product names and installation details so you have useful information for future repairs.
When Should You Install Bathroom Flooring and Tile?
Install bathroom flooring and tile after the surfaces are prepared and any required waterproofing checks are complete. Follow the order recommended for your chosen flooring, vanity, and tile system.
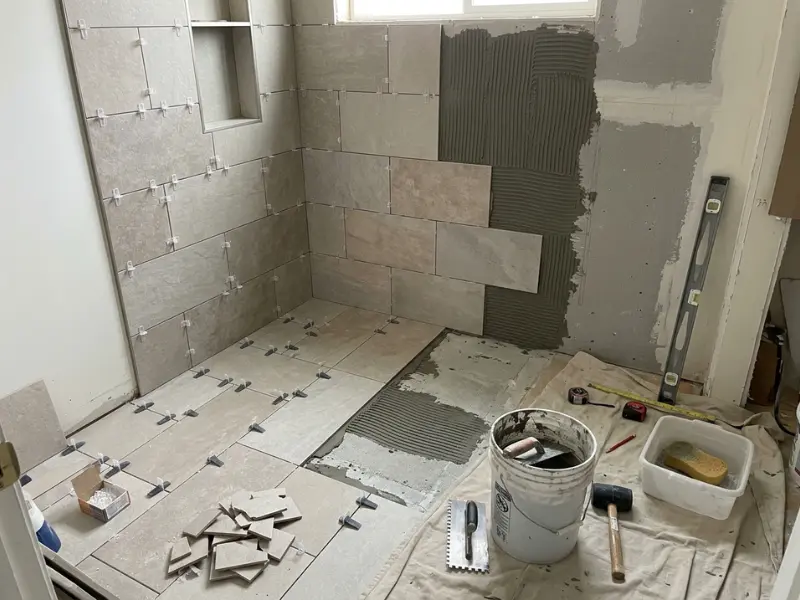
Tile work needs careful measuring, clean surfaces, and enough time for the mortar and grout to cure. Rushing these steps can lead to uneven tiles, weak bonds, or damaged finishes.
Install Wall and Floor Tile
Start by confirming the tile layout. A dry layout helps you spot narrow cuts, awkward corners, and grout lines that may look uneven around fixtures.
Use the correct mortar for the tile and surface. Keep grout joints even, and follow the product instructions for setting, grouting, and curing times.
For example, large floor tiles may need a flatter surface than smaller tiles. Your installer should check the floor before laying tile rather than trying to hide dips with extra mortar.
Protect the New Surfaces
Fresh tile and grout need time before they can handle normal use. Keep heavy tools, ladders, and stored materials away from finished surfaces.
- Follow the stated curing time before walking on new tile.
- Use suitable protection when other trades return to the room.
- Keep grout and tile clean during later installation work.
- Seal grout only when the product requires it.
Follow the Planned Installation Order
There is no single order that works for every bathroom. Some projects install tile before the vanity, while others use a different sequence based on the flooring, cabinet design, and manufacturer’s instructions.
Confirm the finished floor height: Tile, mortar, and underlayment can raise the floor. Check the final height against the door, toilet flange, vanity, and shower entry before installation begins.
When Should You Install the Vanity, Toilet, Tub, and Shower Fixtures?
Install bathroom fixtures after the supporting surfaces are ready and the planned installation order allows safe access. Each fixture must fit correctly, connect properly, and be tested before the job is finished.
Check product instructions before installation because different fixtures need different supports, clearances, and connections. Keep access to shut-off valves and service points where future repairs may be needed.
Install the Vanity and Sink
Confirm the vanity’s position before securing it. Check that drawers open fully, doors clear nearby walls, and plumbing lines match the sink connections.
Seal the areas that need protection from splashes according to the product instructions. After connecting the faucet and drain, run water and check underneath for leaks.
For example, a deep drawer may hit a drain pipe if the vanity layout was not checked before installation. Test drawers and doors before calling the work complete.
Connect the Toilet, Tub, or Shower Fixtures
Set each fixture according to its installation instructions. A toilet needs a sound, level base and a proper seal at the drain connection.
Once connections are complete, test the fixtures:
- Flush the toilet several times and check around its base.
- Run the sink and look for leaks beneath the vanity.
- Turn on the shower and check water flow and temperature.
- Fill and drain the tub, if installed, and inspect its connections.
Fit Shower Doors and Glass
Measure the finished shower opening before ordering custom glass. Tile thickness, wall alignment, and the final opening size can affect the fit.
Follow the glass manufacturer’s instructions for installation and sealing. Do not use the shower until the required sealants have cured.
Test fixtures before closing out the job: Run water through each connection while the area beneath or behind it is still accessible. A small leak is easier to fix before stored items, trim, or final paperwork get in the way.
What Finishing Touches Should You Complete Last?
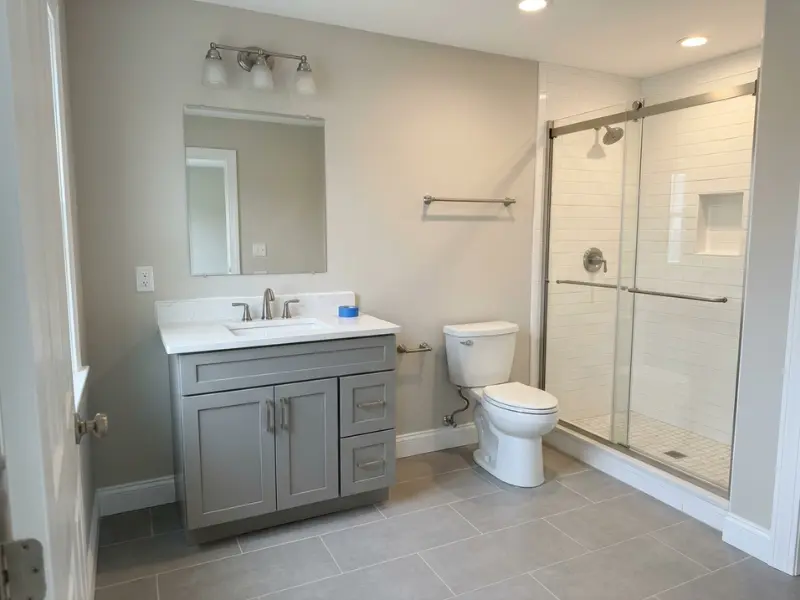
Complete painting, trim, caulking, lighting, mirrors, and accessories after the main construction work is finished. These final details make the bathroom ready for daily use and help protect surfaces from moisture.
Check the manufacturer’s instructions for each finish. Some sealants and paints need drying or curing time before you can use the room normally.
Finish Paint, Trim, and Caulk
Touch up painted walls and ceilings after dusty work is complete. Fit trim carefully, and apply the correct sealant where the design requires a flexible, water-resistant joint.
Do not use caulk to hide a poor fit or a serious gap. Fix the underlying problem first, then seal the joint as directed.
For example, the joint where a vanity meets a wall may need suitable sealant to keep splashes from getting behind the cabinet. Follow the vanity and sealant instructions for the correct product and placement.
Install Lights, Mirrors, and Accessories
Install mirrors, towel bars, toilet paper holders, and shelves in places that are easy to reach. Check the wall behind each fitting before drilling so you do not damage pipes or wiring.
- Place towel bars where towels can dry properly.
- Keep mirrors and lights useful for everyday grooming.
- Make sure accessories do not block doors or drawers.
- Keep shut-off valves and service panels accessible.
Test the room as you use it: Stand at the sink, open the drawers, step into the shower, and reach for a towel. Testing the bathroom layout before the final walkthrough can reveal towel bars, mirrors, or shelves that are difficult to reach.
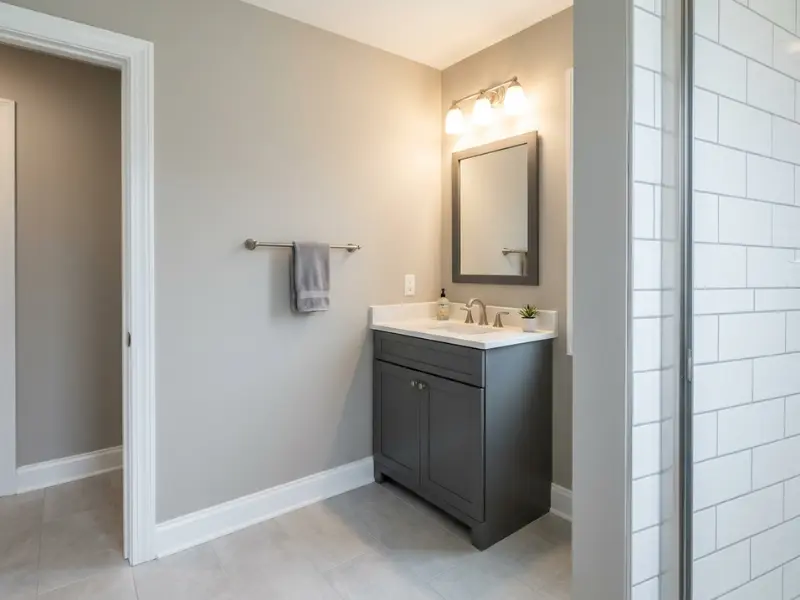
How Long Do Bathroom Remodel Steps Usually Take?
A bathroom remodel may take several days for simple updates or several weeks for a full renovation. The schedule depends on the project size, material delivery, contractor availability, inspections, and hidden repairs.
Separate planning time from active construction time. You may spend weeks choosing fixtures and waiting for materials before demolition even starts.
Compare Typical Project Stages
These are broad planning estimates, not guaranteed schedules. Actual times vary by home and project.
| Project type | Rough planning estimate |
| Cosmetic refresh | A few days to about 1 week |
| Partial remodel | Around 1 to 3 weeks |
| Full bathroom remodel | Around 3 to 8 weeks or longer |
A full remodel may take longer when the layout changes, custom materials are delayed, or repairs are needed behind walls. Ask your contractor for a schedule based on the actual scope of work.
Understand What Causes Delays
Common causes include:
- Damaged framing or subfloor discovered during demolition.
- Late delivery of tile, vanities, or custom shower glass.
- Permit or inspection scheduling.
- Changes to the layout or finish choices after work begins.
- Required drying and curing time for waterproofing, mortar, grout, and sealants.
For example, if custom shower glass cannot be measured until the tile is installed, its production and delivery may extend the final stage.
Build a Realistic Schedule
Ask your contractor to identify the main stages, expected dates, and tasks that depend on other work. Confirm when your bathroom will be unavailable and whether water or toilet access will be interrupted.
Track dependencies, not just dates: A tile delivery date matters because waterproofing and surface preparation must be ready first. Ask which tasks could delay the next stage so you can act before the schedule slips.
What Bathroom Remodeling Mistakes Should You Avoid?
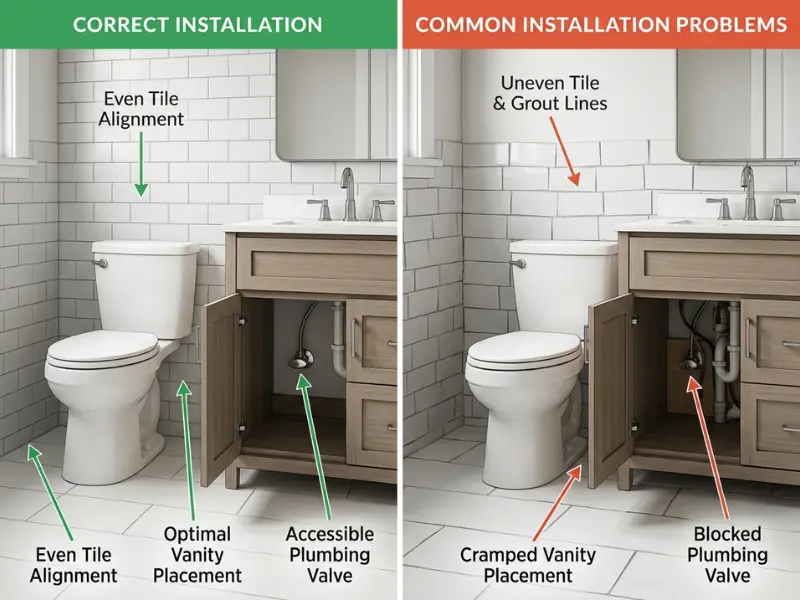
The most common bathroom remodeling mistakes include starting before decisions are final, ignoring hidden damage, choosing materials that do not fit, and rushing installation checks. Careful planning can prevent many of these problems.
A good-looking bathroom is not enough if fixtures leak, doors hit cabinets, or moisture gets behind the walls. Check both how the room looks and how it works.
Avoid Starting Before Key Decisions Are Final
Choose the main fixtures, layout, and finish materials before demolition whenever possible. Changing a shower size or vanity after plumbing work begins can lead to extra labor and delays.
Keep a written record of the approved choices. Share the same plan with everyone working on the project.
Do Not Ignore Hidden Problems
Never cover damaged wood, a leaking pipe, or a weak subfloor just to keep the project moving. Fix the cause and confirm the repair before new materials go over it.
For example, new tile will not stop a leaking shower valve inside the wall. The valve or connection must be repaired first.
Do Not Rush Checks and Curing Times
Follow the required checks and product instructions at each stage. Waterproofing, mortar, grout, and sealants may need specific curing times before the next task begins.
Other mistakes to avoid include:
- Choosing slippery flooring without checking its suitability for wet areas.
- Blocking access to plumbing valves or service panels.
- Ordering fixtures before confirming measurements.
- Skipping required permits or inspections.
Use stop points: Agree with your contractor that work will pause for key checks, such as after demolition, before walls close, after waterproofing, and before final payment. This gives you a chance to address problems while they are still easy to reach.
What Should You Check During the Final Bathroom Walkthrough?
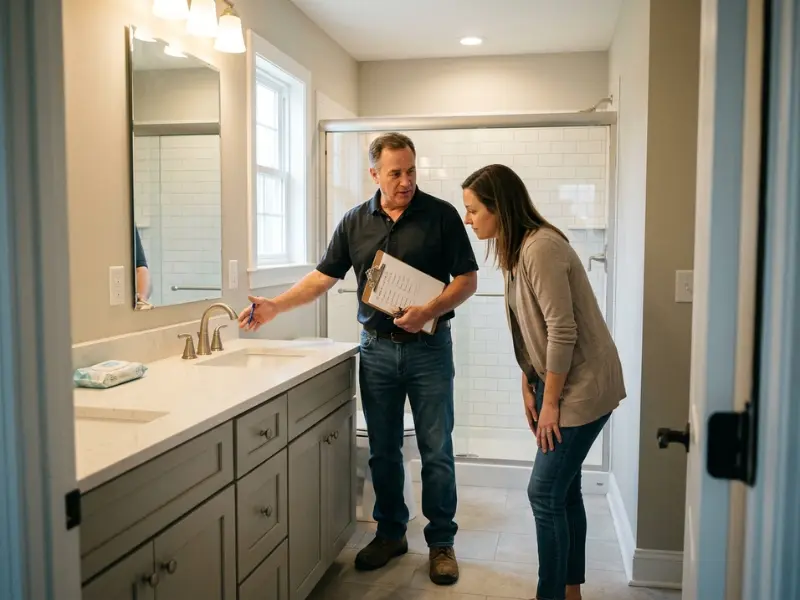
During the final walkthrough, test every fixture, inspect the finished surfaces, and make a written list of anything that still needs fixing. Do not rely on appearance alone to decide whether the bathroom is ready.
Walk through the room with your contractor before signing off on unfinished work or making final payments. Check the agreed contract and payment terms, including any amount held until listed repairs are complete.
Test Every Fixture and System
Run water through the sink, shower, and tub, if present. Flush the toilet several times and look for leaks, slow drainage, or unusual movement.
Check these items:
- Faucets, shower controls, drains, and visible pipe connections.
- Toilet flushing, filling, and base seal.
- Lights, switches, outlets, and required safety protection.
- Exhaust fan operation and airflow.
- Doors, drawers, shower doors, and cabinet fittings.
For example, run the shower long enough to check its temperature and drainage, then inspect nearby areas for signs of leaking. Follow any test instructions provided for the installed fixtures.
Inspect Surfaces and Finishing Work
Look closely at tile lines, grout, caulk, paint, trim, and countertop edges. Check that doors open freely and that drawers do not hit pipes or nearby fittings.
Make sure the work matches the agreed plan and materials. Photograph any defects and add them to the repair list instead of relying on a verbal promise.
Finish the Punch List and Paperwork
A punch list is a written record of work that still needs attention. Give each item a clear description and agree on who will fix it and by when.
Collect the relevant documents before closing out the project:
- Permit and inspection records, where applicable.
- Product manuals and warranty details.
- Care instructions for tile, grout, and countertops.
- Contractor information and records of approved changes.
Keep a simple room-by-room record: Take final photos of the finished bathroom and save them with receipts, warranties, and repair notes. If a leak or product issue appears later, these records can help you explain what was installed and when.
Frequently Asked Questions
What Are the Steps to Remodel a Bathroom in Order?
The usual bathroom remodel steps are planning the budget, choosing a layout, hiring a contractor, ordering materials, preparing the home, and removing old fixtures. Next come plumbing, electrical work, repairs, waterproofing, tile, fixture installation, and finishing touches. The final steps are testing everything, fixing problems, and completing required inspections.
What Should You Do First When Remodeling a Bathroom?
Start by deciding what needs to change and how much you can spend. Check whether you need a simple refresh, a partial remodel, or a full renovation. Measure the room, list your main needs, and review the existing layout before choosing fixtures or removing anything.
How Long Does a Bathroom Remodel Take?
A cosmetic bathroom update may take a few days to a week, while a partial remodel often takes one to three weeks. A full renovation may take three to eight weeks or longer. Material delays, hidden water damage, permit checks, and custom fixtures can extend the schedule.
How Much Does a Bathroom Remodel Cost?
Bathroom remodel costs depend on room size, labor rates, materials, and how much work is needed. Cosmetic updates usually cost less than a full gut renovation. Get written quotes from local contractors, compare what each price includes, and set aside an extra 10 to 20 percent for unexpected repairs.
Do You Need a Permit to Remodel a Bathroom?
You may need a permit for bathroom work involving plumbing changes, new electrical wiring, structural changes, or major alterations. Rules vary by city and county, so check with your local building department before starting. Simple cosmetic updates may not need a permit, but confirm this locally.
Can You Remodel a Bathroom Yourself?
You can handle some bathroom updates yourself, such as painting, replacing cabinet hardware, or installing simple accessories. Plumbing, electrical work, structural repairs, and shower waterproofing may need trained professionals. Check local rules before starting, and be honest about your skills, tools, time, and ability to fix mistakes.
Should You Install the Floor or Vanity First?
The correct order depends on your flooring type, vanity design, and installation instructions. Some bathrooms have tile installed before the vanity, while other setups use a different sequence. Plan the order before work starts, and check the finished floor height so doors, cabinets, and plumbing connections fit properly.
What Causes Bathroom Remodel Delays?
Bathroom remodel delays often come from late material deliveries, hidden water damage, permit inspections, and changes made after construction begins. Custom vanities and shower glass may also take longer to arrive. Confirm measurements and orders early, keep decisions in writing, and ask your contractor which tasks depend on earlier work.
How Much Extra Money Should You Set Aside for Unexpected Repairs?
Set aside around 10 to 20 percent of your planned bathroom remodel budget as a starting point. For a $10,000 project, that means keeping $1,000 to $2,000 available. Older homes or bathrooms with past leaks may need a larger reserve because hidden damage can increase repair costs.
Conclusion
A successful bathroom remodel starts with a clear plan, not a pile of new tiles. When you know what needs to change, set a realistic budget, and choose materials that fit your space, the whole project becomes easier to manage.
The right bathroom remodel steps also help you avoid costly mistakes. Check your contractor’s work, fix hidden damage before covering it, and make sure the plumbing, electrical systems, and shower waterproofing are handled properly. Give each stage enough time, and never rush the final checks just to finish sooner.
Remember, your bathroom does not need expensive features to work well. Smart choices, useful storage, safe flooring, and good lighting can make a real difference in how you use the room every day.
Take your time, follow the plan, and focus on what matters most to your home. Start with your budget and your must-have changes, then take the first step toward a bathroom that works better for you.