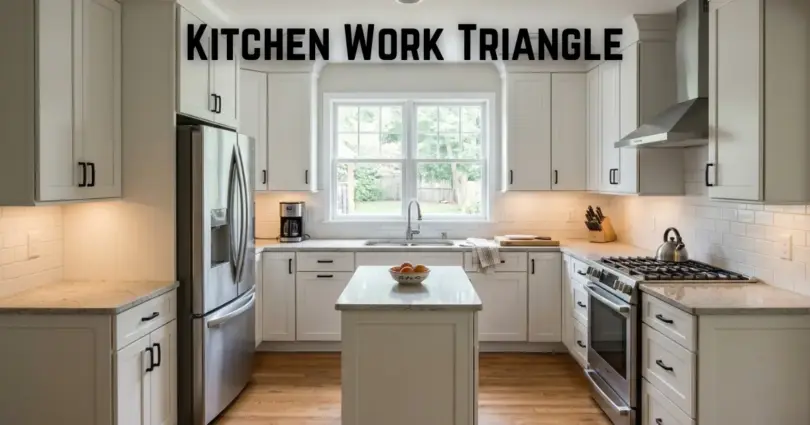

The kitchen work triangle links your sink, stove, and fridge in a triangle. Each side should be 4 to 9 feet long. All three sides together should add up to 26 feet or less.
Keep the path clear of walkways and tall cabinets. This setup cuts extra steps while you cook. It still works today, and you can bend it for islands, small kitchens, and zones.
You grab eggs from the fridge, then trek across the room to the stove. Someone cuts through your path with a laundry basket. You turn and bump the open fridge door.
Let me explain. Most of that frustration comes from a kitchen layout that ignores how you actually move. Designers built the kitchen work triangle to fix exactly that.
We know how hard it is to cook in a space that fights you. A bad layout adds extra steps to every meal, every day.
You can check your own kitchen today with a tape measure.
This guide shows you the kitchen work triangle rules, how to measure your space, and a step counting test. You’ll also learn which mistakes trip people up, and how the triangle works in L-shaped, galley, and single-wall kitchens.
I’ll keep every rule short and give you real numbers. First, what exactly is this triangle?
What Is the Kitchen Work Triangle?
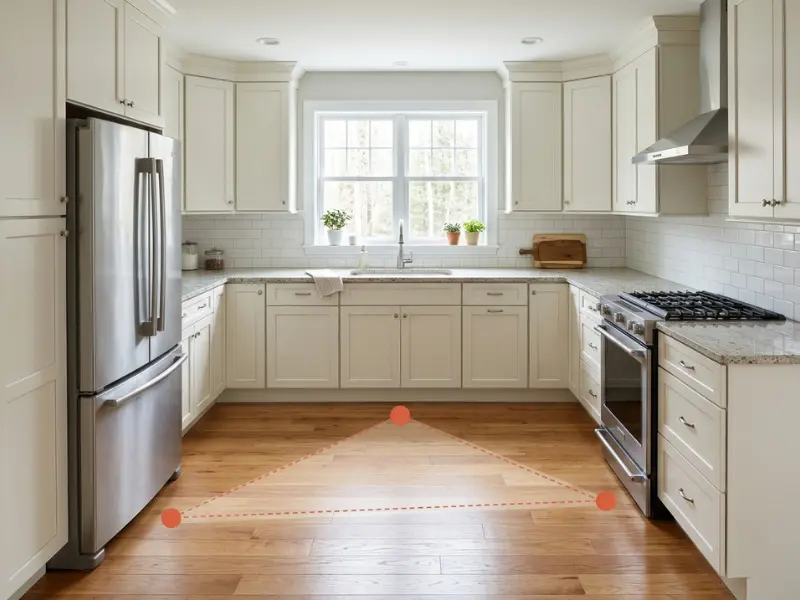
The kitchen work triangle is an imaginary triangle between your sink, cooktop, and fridge. It helps you move between your three busiest spots with fewer steps.
Picture three dots on your kitchen floor plan. Draw a line from each dot to the other two. That shape is the triangle.
The Three Points of the Triangle
Each corner is a spot you use all the time:
- Sink: where you wash food, fill pots, and clean up.
- Cooktop or stove: where you cook. If you also have a wall oven, use the cooktop as your point.
- Fridge: where your food waits until you need it.
Think about making pasta. You grab food from the fridge, rinse it at the sink, and cook it on the stove. Then you walk back to the sink to drain it.
Why the Sink, Stove, and Fridge?
Almost every meal needs cold food, water, and heat. Those three needs live in those three spots.
Put them too far apart, and you walk all day. Put them too close, and you have no room to chop. The triangle gives you the middle ground.
Now for the numbers that make it work.
What Are the Kitchen Work Triangle Rules?
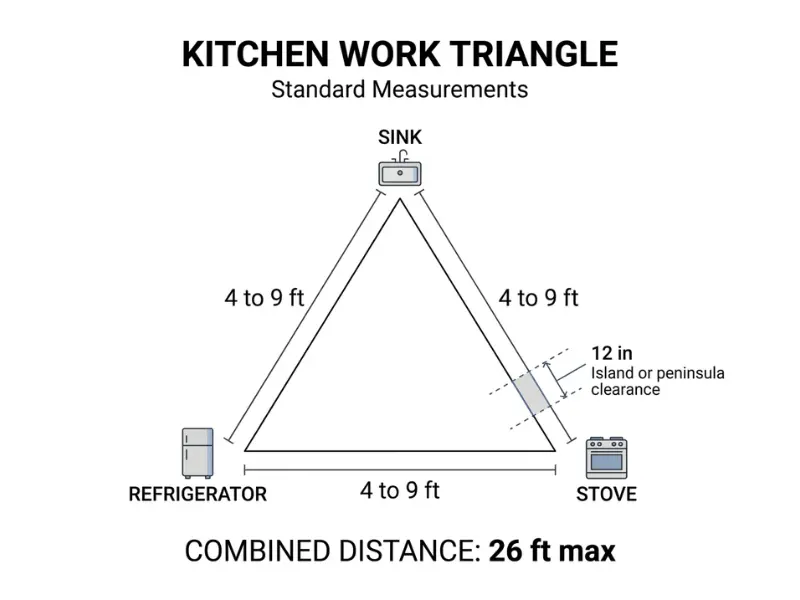
Each side of the triangle should be 4 to 9 feet long, and all three sides together should add up to 26 feet or less. No busy walkway should cut through it.
These kitchen work triangle rules and dimensions come from the National Kitchen & Bath Association, or NKBA. They’re design guides, not laws. I’ll explain each one in plain words.
How Long Should Each Side Be?
Aim for 4 to 9 feet between each pair of points.
- Under 4 feet: you feel cramped, and two cooks bump into each other.
- Over 9 feet: you walk too far with wet or hot things in your hands.
A 5 foot side feels close but roomy. A 12 foot side means a long trek every time you carry a hot pot to the sink.
How Big Should the Whole Triangle Be?
Add up all three sides. The NKBA says the total should be 26 feet or less.
The 26 foot cap is the firm number. Past it, you spend too much of your cooking time walking.
Why Do Some Sources Say 4 to 8 Feet or a 13 Foot Minimum?
You may see different numbers online. Naked Kitchens says 4 to 8 feet per side. KitchenAid and Naked Kitchens both list 13 feet as the lowest total.
The truth is, these are guides, so small gaps between sources are normal.
The NKBA sets a 4 foot minimum for each side and a 26 foot maximum for the total, with no minimum for the total. Three sides at 4 feet add up to 12, so a 13 foot minimum sounds about right.
For this guide, we use the NKBA numbers: 4 to 9 feet per side and 26 feet total.
The Island Rule
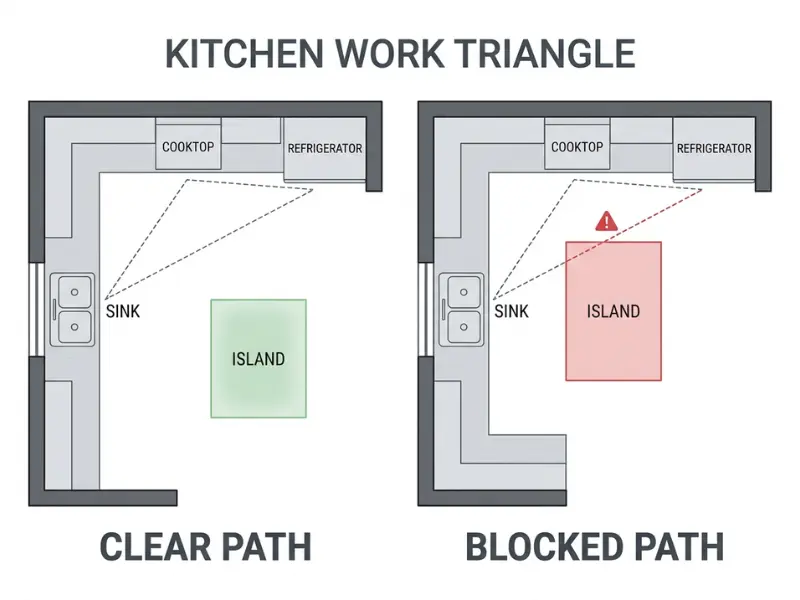
No side of the triangle should cross an island or peninsula by more than 12 inches. A little overlap is fine. More than that, and you walk around the island instead of straight across.
Imagine an island that sticks 2 feet into the line between your sink and stove. That’s too much. You’d detour around it every time.
Traffic and Tall Obstacles
Two more rules keep the path clear:
- No major walkway should cross the triangle, like the route from the back door to the living room.
- A full-height pantry cabinet or fridge should not sit between two points.
Think about it this way: if your kids run through your cooking path to reach the yard, someone will get bumped while holding something hot.
How Wide Should the Work Aisle Be?
The work aisle is the walking space between two facing counters or appliances. The NKBA says leave at least 42 inches for one cook and at least 48 inches for two or more.
That’s about 3.5 feet for one cook and 4 feet for two. A tape measure checks this in seconds.
Rules are easy to read. They’re harder to check in your own kitchen, so grab a tape measure.
How Do You Measure Your Kitchen Work Triangle?
Measure in a straight line along the floor, from the sink to the cooktop to the fridge and back to the sink. Add the three numbers and check them against the rules.
All you need is a tape measure, a pen, and about 10 minutes.
Step by Step: Grab a Tape Measure
- Mark the center front of your sink, cooktop, and fridge with small pieces of painter’s tape.
- Measure from the sink mark to the cooktop mark. Run the tape in a straight line along the floor, and write the number down.
- Measure from the cooktop mark to the fridge mark. Write it down.
- Measure from the fridge mark back to the sink mark. Write it down.
- Add the three numbers together.
- Check each side for 4 to 9 feet, and the total for 26 feet or less.
If an island or tall cabinet blocks your straight line, note how far it sticks in. You’ll need that number for the 12 inch island rule.
A Worked Example With Real Numbers
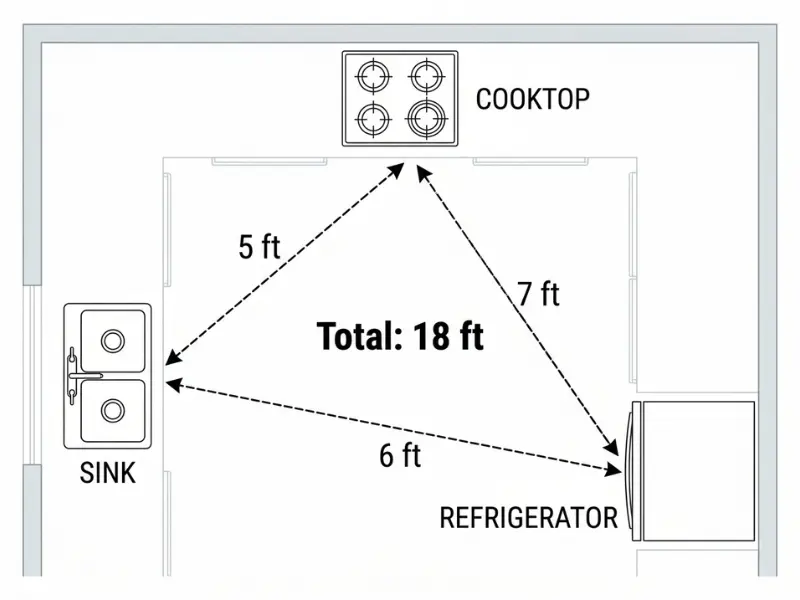
Suppose your measurements look like this:
- Sink to cooktop: 5 feet
- Cooktop to fridge: 7 feet
- Fridge to sink: 6 feet
The total is 18 feet. Every side sits between 4 and 9, and the total is under 26. This triangle passes.
Now change one number. Move the fridge so it sits 11 feet from the sink. The total is 23 feet, which still looks fine. But one side is over 9 feet, so the triangle fails.
What actually works is checking both numbers. A kitchen can pass the total and still fail on one side.
A miss of a foot or two isn’t a disaster. You’ll find fixes for common layouts further down.
The Step Counting Test
Numbers only tell part of the story. Your own steps tell the rest.
Make something easy, like scrambled eggs and a cup of tea. Count your steps between the sink, fridge, and stove. Use your phone’s step counter, or count out loud.
Then change one thing. Maybe you move your cutting board next to the stove. Make the same meal and count again.
There’s no official “right” step count. What matters is whether your number drops. It’s the same idea behind the first kitchen motion studies: count the steps, then cut them.
Once you have your numbers, the next question is why a triangle saves steps at all.
Why Does the Work Triangle Save You Steps?
It cuts wasted steps and keeps two cooks from bumping into each other. Your food, water, and heat stay close without feeling crowded.
A well-sized kitchen work triangle gives you two things: less walking while you cook, and more room when someone joins you.
Fewer Steps, Less Tiredness
Here is the thing. One extra step feels like nothing. Thousands of them add up.
Suppose a better layout saves you 40 steps per meal. Over three meals, that’s 120 steps a day, or about 43,800 steps a year. This is an example, not a study.
The triangle also lets you move in a loop: fridge, sink, stove. You rarely walk back the way you came.
Less Crowding When Two People Cook
You and a friend are making dinner. One of you grabs food from the fridge while the other stirs a pan. When the three points sit at the right distance, your paths don’t cross.
Giving each person a side works well. One person preps on the fridge to sink side. The other cooks at the stove. You meet only at the sink.
It won’t turn one triangle into a party kitchen, but it stops most of the bumping. That idea is almost a hundred years old.
Where Did the Work Triangle Idea Come From?
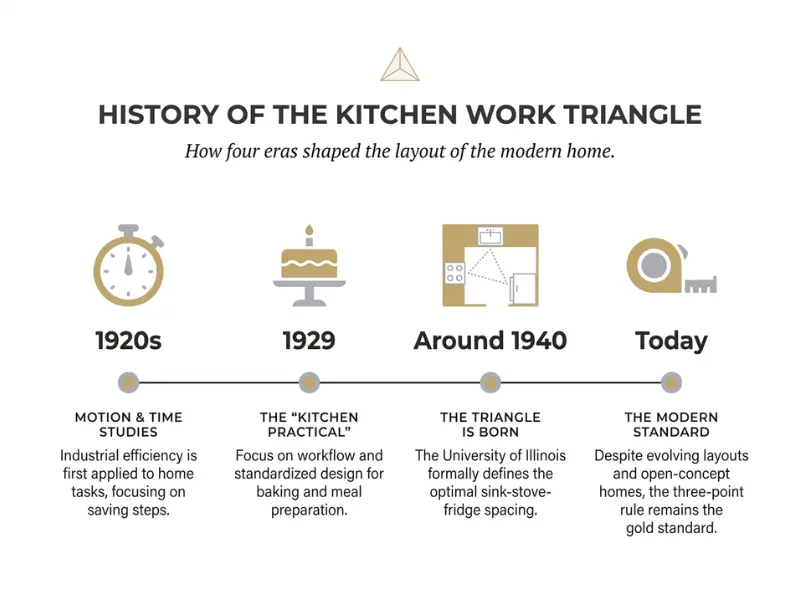
The idea started with Lillian Gilbreth’s motion studies in the 1920s. The triangle rules took shape at the University of Illinois in the 1940s, and the NKBA still lists them today.
KitchenAid points to the University of Illinois around 1940. Naked Kitchens points to Gilbreth in the 1920s. Both stories fit on one timeline, and both led to the kitchen work triangle.
Lillian Gilbreth and the Strawberry Shortcake Test (1929)
Lillian Gilbreth was an engineer and industrial psychologist who studied how people move while they work.
She called her idea circular routing: a loop that cuts the steps needed to finish a kitchen task.
At a women’s exposition in 1929, she made strawberry shortcake twice. First, she used a scattered kitchen typical of the 1920s. Then she used her own L-shaped layout, with cooking, prep, and food storage within easy reach.
The step count fell from 281 to 45. Same cake, same cook, 236 fewer steps.
The University of Illinois Research in the 1940s
Around 1940, a group of architects at the University of Illinois used basic geometry to arrange the three work stations in a kitchen. Their aim was to cut extra movement and clear the path.
Today the NKBA still lists the triangle in its kitchen planning guidelines. That’s why the numbers you read earlier are the ones planners use.
The whole story fits in four lines:
- 1920s: Gilbreth studies how cooks move
- 1929: Her shortcake test drops 281 steps to 45
- Around 1940: Illinois architects turn the idea into triangle rules
- Today: The NKBA still lists the triangle in its guidelines
A rule from the 1940s still has to fit the kitchen you have now, and kitchens come in many shapes.
How Does the Work Triangle Fit Different Kitchen Layouts?
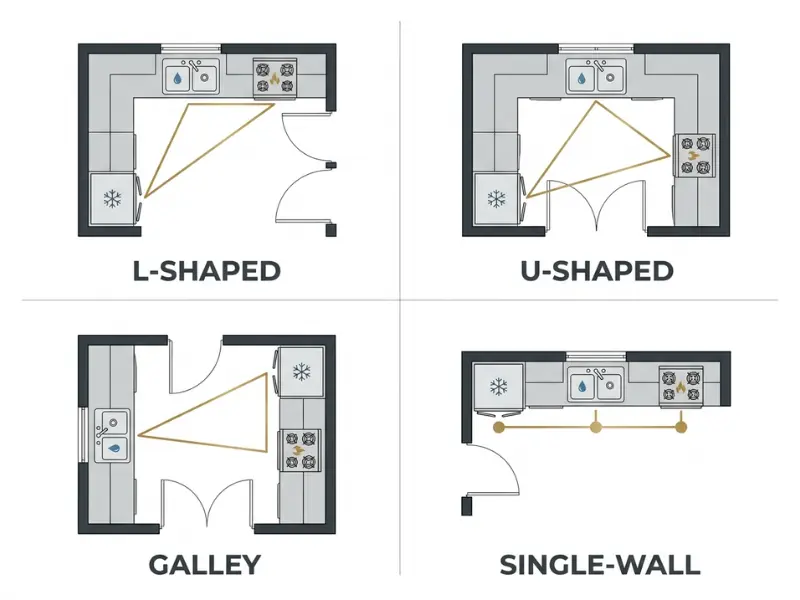
The kitchen work triangle fits L-shaped and U-shaped kitchens best. Galley and single-wall kitchens use a flat version, with the three points in a row or on two sides.
Below, you’ll see the triangle in four common layouts, plus peninsula kitchens. Each one comes with example numbers and one thing to watch.
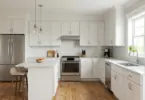
L-Shaped Kitchens
This is the easiest fit. The sink, cooktop, and fridge sit along two walls, so the triangle forms on its own.
- Example: Sides of 5, 6, and 8 feet give you a 19 foot total.
- Watch out for: a cooktop jammed in the corner, which costs you elbow room and counter space.
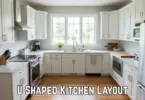
U-Shaped Kitchens
Counters wrap around you on three sides. You get plenty of storage, but the sides can run too long.
- Example: A 4 foot aisle puts two facing points about 4 feet apart, right at the minimum.
- Watch out for: long arms, which can push a side past 9 feet.
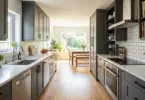
Galley Kitchens
Two rows of counters face each other. The triangle becomes a slim shape stretched across the aisle.
- Example: Put the sink and cooktop 4 feet apart on one row, and the fridge across from the sink. With a 4 foot aisle, the total comes to about 14 feet.
- Watch out for: a galley with a door at each end, because it turns into a hallway and breaks the traffic rule.
Single-Wall Kitchens
All three points sit on one wall, so you can’t make a real triangle. You make a flat one instead.
- Example: Fridge, sink, stove in a row, each 4 feet from the next. That’s 4, 4, and 8 feet, or 16 feet total.
- Watch out for: no prep space. The NKBA wants at least 30 inches of clear counter right next to the sink.
Peninsula Kitchens
A peninsula is a counter attached to a wall or cabinet at one end. It follows the same 12 inch rule as an island.
- Example: Put the sink or cooktop on it, and it becomes one point of your triangle.
- Watch out for: a peninsula that blocks the walkway into the kitchen.
Islands look similar to peninsulas, but they change the triangle in a few more ways.
Does the Triangle Work With a Kitchen Island?
Yes. An island can be one corner of your kitchen work triangle, or it can sit outside it as extra prep space. Either way, it shouldn’t cut into any side by more than 12 inches.
Islands are the main reason modern kitchens don’t match the old drawings. You can use one in two ways, and you can test yours before you build.
Island as One of the Three Points
Put the sink or the cooktop in the island, and it becomes a corner of your triangle. The other two points stay on the walls.
- Cooktop in the island: you face the room while you cook, but you must plan a vent hood or downdraft early.
- Sink in the island: you face the room while you wash up, but pipes must run through the floor.
The island stops blocking your path and starts being part of it.
Island as Prep Space Only
Many people keep the sink, cooktop, and fridge on the walls and use the island for chopping and serving. The triangle then forms around the island, not through it.
That’s the easiest setup to get right. You gain counter space without adding steps.
The 12 Inch Rule and Walkway Space Around the Island
You met the 12 inch limit earlier. You can test it before you build or buy the island.
Mark the island’s footprint on the floor with painter’s tape. Then stretch a string between your sink and cooktop. Measure how far the tape crosses the string. Twelve inches or less passes.
If it crosses by 2 feet, that fails. You can slide the island over, shorten it by a foot, or move the sink or cooktop into it so it becomes a corner.
Leave room to walk, too. The NKBA says a walkway should be at least 36 inches wide. Where someone works at the island, use the wider aisle numbers from earlier.
Not everyone has room for an island, though. Plenty of people cook in a space that feels more like a hallway.
Can You Use the Work Triangle in a Small Kitchen?
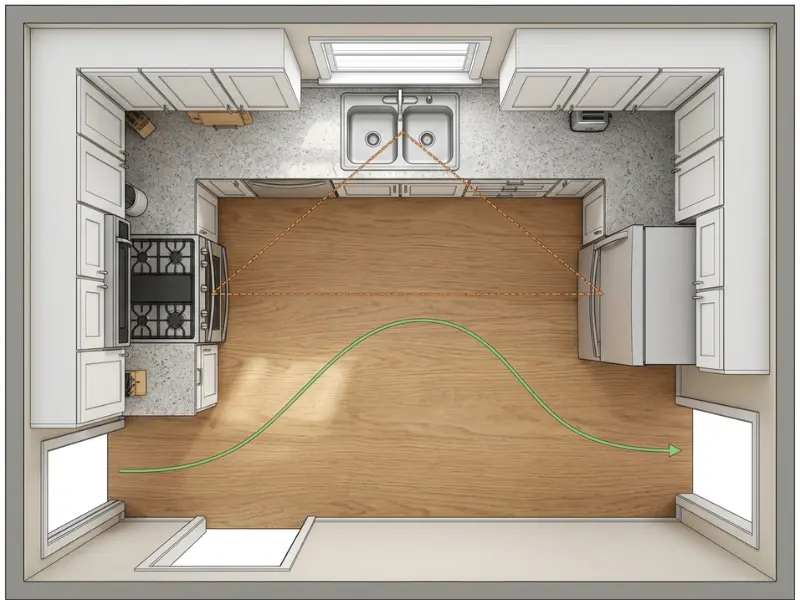
Yes. You may not fit a perfect kitchen work triangle, but you can still keep the three points close and the path clear.
The NKBA’s 4 foot minimum is a guide, and a tiny kitchen may have to bend it. You’ll see what you can give up, what you shouldn’t, and four moves that keep a tight kitchen easy to cook in.
When the Legs Are Shorter Than 4 Feet
The 4 foot minimum protects your elbow room. In a tiny kitchen, you may only have 3 feet between the stove and the sink. That’s okay if you can still work comfortably.
Try this check. Stand in the middle of your triangle and open the fridge and the oven. If both open fully and you still have room to stand, the space works. It’s a quick test, not an official rule.
Small Kitchen Tips That Keep the Triangle Working
In a tiny kitchen, protect two things first: a clear walking path, and some counter between the sink and the stove.
- Put the fridge at the end of a counter run so it doesn’t split your prep space.
- Add a rolling cart for chopping, and park it away when you’re done.
- Pick a 24 inch range or a smaller cooktop to free up counter space.
- Hang pots and tools on a wall rail close to the stove.
Small kitchens and big islands raise the same question: is the old triangle still worth using?
Is the Kitchen Work Triangle Outdated?
Not outdated, but it’s no longer the whole plan. Planners still start with it, then add zones to handle modern kitchens with more people and more appliances.
Designers made the triangle for a simpler kitchen. Below you’ll see where it falls short, what the experts still say about it, and a clear verdict you can use.
Where the Triangle Falls Short
The old rules picture one cook in a small, closed kitchen. Today’s kitchens do much more.
- Many cooks: more than one person often works at the same time.
- More jobs: kitchens now host homework, crafts, and parties.
- More gear: dishwashers, microwaves, and wine fridges sit outside the three points.
- Open plans: islands and seating change where people walk.
One person is baking, a kid is doing homework at the island, and someone is loading the dishwasher. A one-cook triangle doesn’t plan for that.
What the Experts Say Now
Some headlines say the triangle is out for 2026. Yet the NKBA still lists it in its kitchen planning guidelines, and brands like KitchenAid and Naked Kitchens still teach it.
KitchenAid adds that the rules can be bent to fit your layout. That’s the approach this guide takes: start with the triangle, then adjust.
The Honest Verdict
Keep the triangle. Just stop treating it as the finish line.
Use it to place your sink, cooktop, and fridge first, then check your numbers. After that, plan zones for everything else. That plays out like this:
- You cook often: the triangle matters a lot, so check your numbers.
- You have an open plan with many users: treat the triangle as a start, then focus on zones.
- You have a tiny kitchen: the triangle gets you most of the way there.
A small miss on the numbers isn’t a reason to rebuild your kitchen.
That leaves zones. They’re the layer that picks up where the triangle stops.
What Are Kitchen Zones, and How Do They Work With the Triangle?
Kitchen zones group your kitchen by task, like prepping, cooking, cleaning, and storing. The triangle covers your three big spots, and zones cover everything else.
Think of zones as the second layer of a good layout. Below you’ll see the common ones, how to place them around your triangle, and how newer appliances fit in.
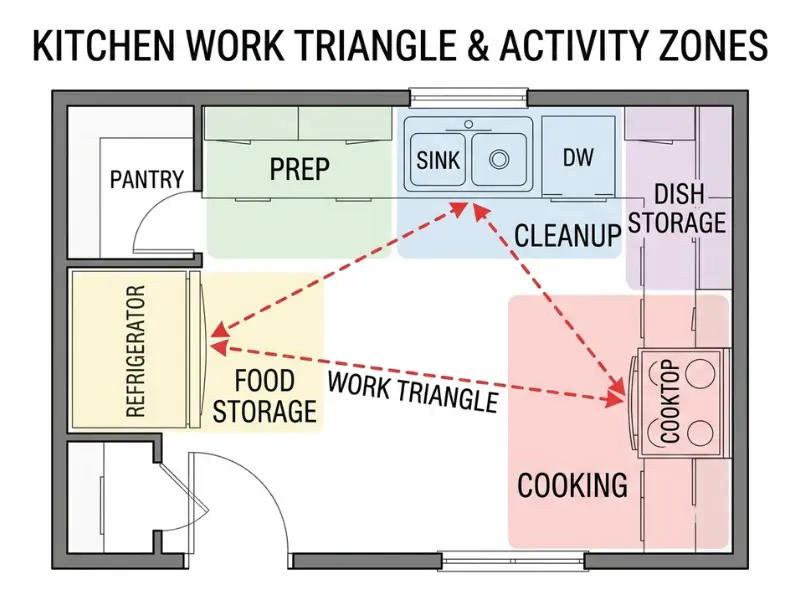
The Common Kitchen Zones
A good way to start is with five zones. Each one is just a spot where one kind of job happens.
- Food storage: the fridge and pantry, where ingredients wait.
- Prep: open counter for chopping and mixing.
- Cooking: the cooktop, plus the pots, pans, and spices you use there.
- Cleanup: the sink, dishwasher, and trash bin.
- Dish and tool storage: plates, cups, and utensils.
Each zone should hold what its job needs. When your spices live next to the stove, you stop crossing the room for one jar.
Using the Triangle and Zones Together
Place the triangle first. Then build the zones around it.
- Check your triangle numbers against the rules.
- Put your main prep counter between the sink and the cooktop. You walk that path the most.
- Store pots, pans, and spatulas within arm’s reach of the cooktop.
- Keep plates and cups close to the dishwasher so unloading takes few steps.
- Move the grab-and-go items to the edge of the kitchen.
And here is why step 5 matters. Say your kids grab snacks every afternoon.
If the snack drawer sits beside the stove, they walk straight through your cooking path. Put it near the kitchen entrance, and the path stays clear.
How Wall Ovens, Second Sinks, and Fridge Drawers Change Things
Newer kitchens have more appliances than the old drawings pictured. Three common ones fit like this.
- Wall oven: the cooktop stays your triangle point, and the oven needs 15 inches of counter beside or above it.
- Second sink: it counts as an extra work center, so keep it 4 to 9 feet from your other points.
- Fridge drawers or a beverage fridge: your main fridge stays the point, so place extras at the edge, away from the cooktop.
The rule of thumb: your main appliances make the triangle, and the extras fit around it.
Even a well-zoned kitchen can go wrong in small ways, and the same few slip-ups keep showing up.
What Are the Most Common Work Triangle Mistakes?
The most common mistakes are legs that run too short or too long, a walkway through the triangle, a tall cabinet in the path, and a fridge door that blocks the cook.
You know the kitchen work triangle rules by now. Here you’ll see how each mistake shows up in a real kitchen and the cheapest way to fix it.
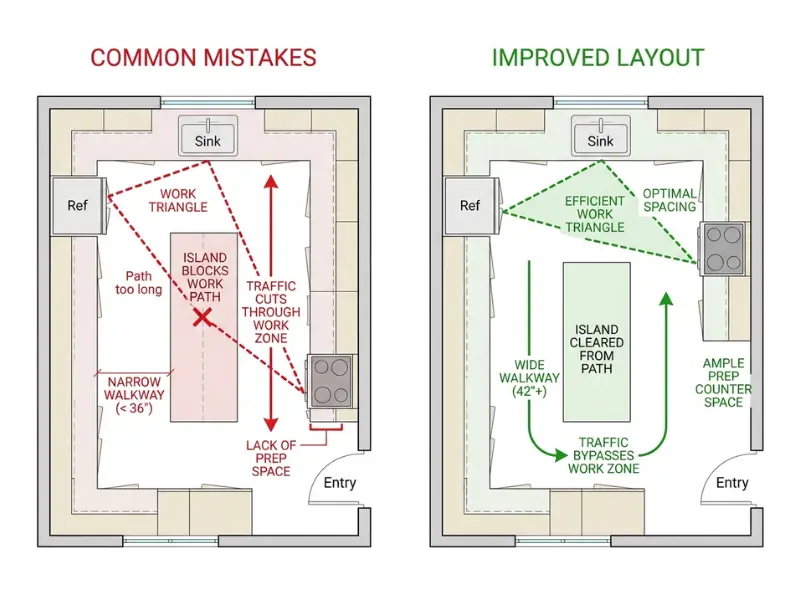
Walkway Cutting Through the Triangle
- Sign: you hear “excuse me” behind you while you cook.
- Fix: move whatever pulls people in, like the trash bin or the table.
If the path comes from a back door, shift your prep area away from that line.
Legs Too Short or Too Long
- Sign: your elbows hit a counter, or you carry hot pots across the room.
- Fix: bring the farthest point closer, or add a small prep spot near the stove.
A fridge at the far end of the kitchen is the classic long leg. Often the easiest point to move is the fridge, since it needs only an outlet and sometimes a water line.
Tall Cabinets or Fridge Blocking the Path
- Sign: you walk around a pantry cabinet to get from one point to the next.
- Fix: move the tall unit to the end of a counter run.
Imagine your pantry sits between the sink and the stove. Slide it to the end of the wall, and it stops splitting your path.
Fridge Door Swing That Blocks the Cook
- Sign: you open the fridge and the door hits the cook or blocks the aisle.
- Fix: swap the hinge side so the door opens toward the wall.
Many fridges let you do that. A French door fridge uses two narrower doors, so it usually needs less swing room. The NKBA also says appliance doors shouldn’t bump into each other or into an entry door.
Try a quick test. Open the door fully and stand where you’d cook. If you can’t pass, you’ve found the problem.
One Triangle for Two Cooks
- Sign: two people cook often and fight for the same sink.
- Fix: add a second sink or prep counter so the second cook has their own point.
If your kitchen has extra work centers, the NKBA says each extra distance should also be 4 to 9 feet. Place the second sink with that range in mind, and give both cooks a work aisle at least 48 inches wide.
A few questions keep coming up even after all of this, so the answers below are short.
Frequently Asked Questions
What is the golden triangle in a kitchen?
The golden triangle is another name for the kitchen work triangle. It’s the imaginary triangle between your sink, cooktop, and fridge. Both names mean the same thing, so the same rules apply: 4 to 9 feet per side and 26 feet or less in total.
What is the perfect kitchen triangle?
There’s no single perfect size, but a good triangle passes three tests. Each side runs 4 to 9 feet. The total stays at 26 feet or less. Nothing blocks the path, like a full-height cabinet or a busy walkway. If yours passes all three, cooking will feel easy.
Is the kitchen work triangle dead?
No. The NKBA still lists the kitchen work triangle in its kitchen planning guidelines. What changed is that it no longer does the whole job. Modern kitchens have more cooks and more appliances, so planners add task zones on top of it.
What is replacing the kitchen work triangle?
Nothing has fully replaced it. Many kitchens are now planned by zones, which group the space by tasks like prepping, cooking, and cleaning. Still, no single new standard has taken the triangle’s place, so most good layouts use both ideas together.
Does the work triangle work in a galley or one-wall kitchen?
Yes, in a flatter form. In a galley kitchen, put two points on one row and the third across the aisle. In a one-wall kitchen, you can’t make a true triangle, so line up the fridge, sink, and stove with about 4 feet between them and keep the counter clear.
What is the purpose of the work triangle?
The purpose is to cut extra steps and keep the cooking path clear. When your sink, cooktop, and fridge sit at the right distance, you walk less and bump into fewer people. It also gives planners an easy way to check a kitchen layout before you build anything.
Is the kitchen work triangle a building code rule?
No. The kitchen work triangle is a design guideline from the NKBA, not a building code. The International Residential Code, which most cities build their rules on, says nothing about it. Your city may still set codes for wiring and ventilation, so check with your local building office.
Does the microwave count as part of the work triangle?
No. The three points are the sink, cooktop, and fridge only. A microwave still needs a smart spot, though. The NKBA says its bottom should sit about 3 inches below the main user’s shoulder and no higher than 54 inches off the floor. Add 15 inches of counter beside it.
Conclusion
Your kitchen can get easier to use by tonight. All it takes is a tape measure.
Start with the three points: sink, cooktop, and fridge. Measure from the center of each, along the floor. Each side of your kitchen work triangle should land between 4 and 9 feet, and all three sides should add up to 26 feet or less.
Then check the path for walkways, tall cabinets, and doors that swing into the cook.
Next, make a simple meal and count your steps. Fix one thing, count again, and see if the number drops.
If something is off, start with the cheapest fix, like moving a bin or turning a fridge door. Keep the triangle as your base, and add zones for snacks, dishes, and extra appliances.
Even a small win counts. If your kitchen feels easier than it did yesterday, the tape measure did its job.
Grab your tape measure and check your kitchen work triangle tonight. Your feet will thank you.